
If you’re starting with a Sitecore headless project, the first thing you’ll want to do is figure out how to get data out of Sitecore. You can use GraphQL queries to get data from Sitecore. Sitecore provides a GraphQL Playground UI also called GraphQL IDEA that helps you do exactly that without having to guess. The Playground lets you explore the schema, write queries, and see results instantly, making it a great tool to learn and experiment with. In this blog post, I’m going to share a list of simple steps to help you get started with using the Playground effectively.
What Is the Sitecore GraphQL Playground or GraphQL IDE?
The GraphQL Playground is a web based IDE built into Sitecore’s GraphQL endpoint which provides
- Autocomplete suggestions to speed up writing queries
- Schema documentation so you can explore available fields and types
- Real time query execution so you can immediately see results
- Query history for easy reuse
Step 1: Access the Playground and Configure HTTP Headers and Query Variables
To open the Playground, navigate to your Sitecore instance URL and append the GraphQL endpoint. By default, it usually looks like this
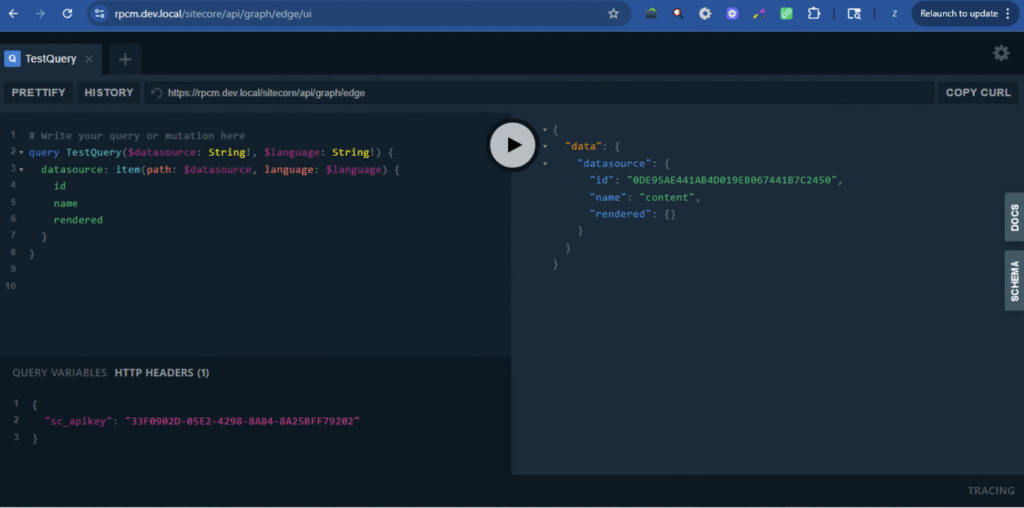
https://<your-sitecore-instance>/sitecore/api/graph/edge/uiOnce you Open, it should show the UI as shown below in the screenshot
- Make sure the URL is correct
- Click on HTTP Headers tab show as (2) in the screenshot below and enter your Sitecore API Key. Sitecore API keys are located under /sitecore/system/Settings/Services/API Keys. If the key does not already exist you can simply create a new item of type API Key. If you create a new item Add * in both CORS Origins and Allowed Controllers fields. The Item ID is your API Key
- Add the API key in the HTTP Header’s tab as shown below
{
  "sc_apikey": "33F0902D-05E2-4298-8A84-8A25BFF79202"
}
Step 2: Explore the Schema
One of the most powerful features of GraphQL Playground is the DOCS panel (on the right-hand side in the screenshot above). This panel gives you a full breakdown of the available queries, mutations, and types within Sitecore’s GraphQL schema.
For example, you’ll find queries like:
item– fetch a single item by ID or pathsearch– run search queries against Sitecore indexeslayout– get rendering and layout details
Exploring the schema first can save you a ton of time by showing you what’s available.
Step 3: Write Your First Query
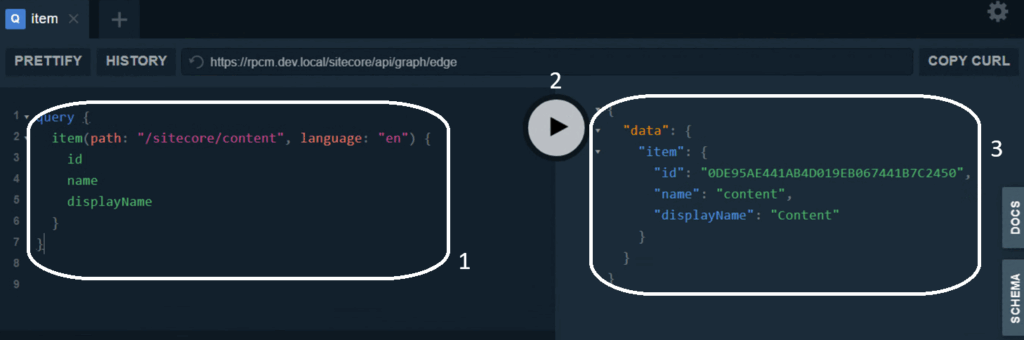
Next step is write your first query, we can start by hard coding the path and try to get basic item details such as ID, Name and display name. When you hit Play ▶️ in the center you’ll instantly get JSON results. This helps you confirm you’re pulling the correct data.
query {
  item(path: "/sitecore/content", language: "en") {
    id
    name
    displayName
  }
}
Step 4: Pass Parameters/Variables to Make Queries Dynamic
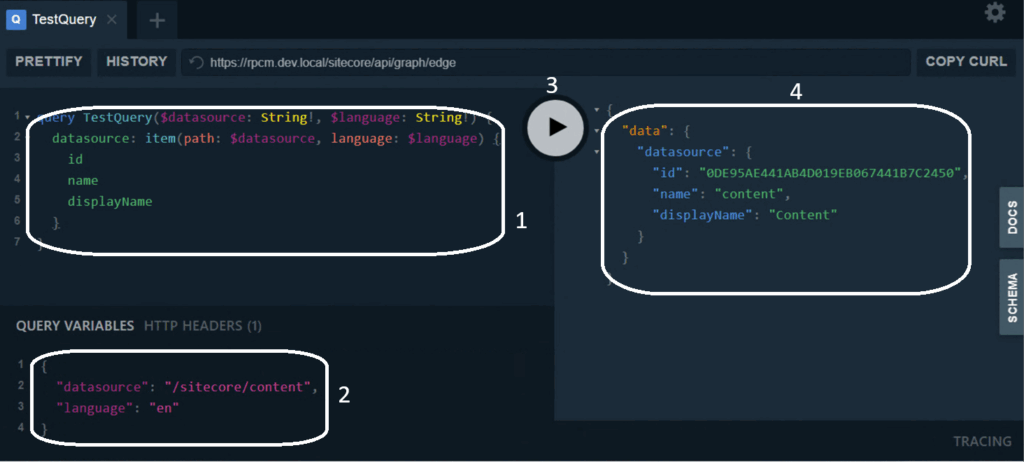
When writing queries you want to use in your real components or queries you cannot hard-code the path and language and you will need to provide them as input, so you should move them to Variables so you can test and copy paste your GraphQL queries as is to Sitecore/Next.js code
{
  "datasource": "/sitecore/content",
  "language": "en"
}
query TestQuery($datasource: String!, $language: String!) {
datasource: item(path: $datasource, language: $language) {
id
name
displayName
}
}
Step 5: Test Complex Queries
The Playground is also great for testing search queries or checking how your custom GraphQL schemas work. For example, you can filter results based on template, language, or custom fields before implementing the query in your code.
This gives you confidence that your query works as intended before wiring it up in your front-end application.
Hashtags:
#Sitecore #GraphQL #HeadlessCMS #WebDevelopment #SitecoreGraphQL #ContentManagement #Developers #NextJS #FrontendDevelopment #DigitalExperience