
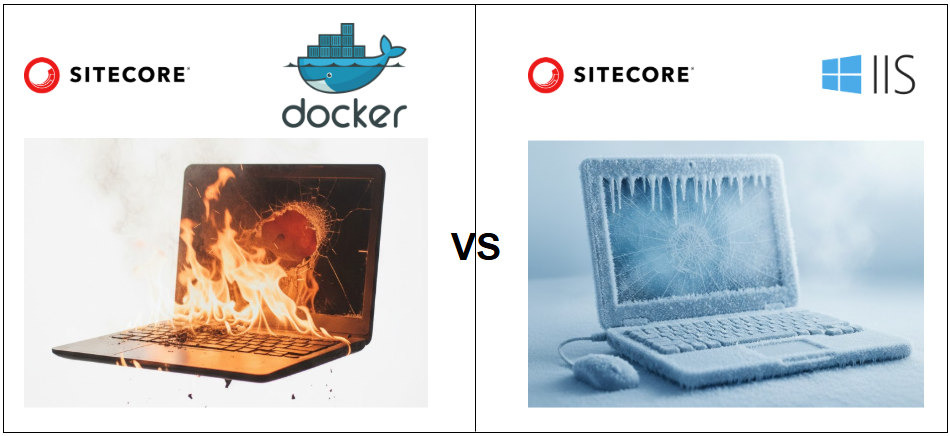
Docker was supposed to make Sitecore development faster and easier. But for many of us, it’s become a real headache. Getting it to run smoothly requires a powerhouse laptop: at least 8 CPU cores and 32GB of RAM. And even then, your computer sounds like a jet engine, the fans never stop, and it gets really hot. Despite all of this, its neither fast nor stable. If your environment crashes, you can waste hours trying to fix it. A simple Docker update can break everything. I’ve lost so much time to this.
I finally got fed up and started thinking about the “old way” of installing Sitecore directly on IIS. You can keep your Docker based project setup but run it locally without Docker. Frontend developers can work without a powerful machine by connecting to a central stable and fast Sitecore instance. Your team can use the same Git project, even if some use Docker and others don’t.
In this blog post I’m going to walk you through step by step guide of setting up a Docker based Sitecore Git Repository. without Docker on a windows machine. You can use any repository, that is using docker setup with this solution but in this example I am using my own Sitecore 10.4.1. Helix example based repository. Varun Sharma have a great blog post about setting up Sitecore MVP Website without docker using Sitecore 10.2. My example uses 10.4.1 and my own repository but you should also be able to use these steps to setup Sitecore MVP or any Docker based Sitecore website without Docker.
Video Tutorial
Prerequisites
Before starting the setup, please make sure you have these software installed.
- Microsoft SQL Server latest version – you can use Developer version as well which is free
- SQL Server Management Tools – free and is included in the installer
- Internet Information Services – using Windows features
- Visual Studio Code
- Visual Studio 2019 or higher
- Git
- If you have docker installed, make sure to quit it.
1. Install Sitecore using Sitecore Install Assistant
First step is to install Sitecore using install assistant, you can check my blog post for detailed steps and a video tutorial. You can use any prefix while installation but in this example we used sc1041 and hence at the end of this setup you should have these links working
- https://sc1041cm.dev.local
- https://sc1041cm.dev.local/sitecore
2. Add a Host file Entries for Custom Domains
Since we are setting up Sitecore 10.4.1. Helix example based repository therefore we will need those custom hosts added to our local host file so that can work on local machine. For this open Notepad as Administrator and then open file C:\Windows\System32\drivers\etc\hosts and add these at the end of the file, save and close the file. Skip if these already exist via the Docker installation
127.0.0.1 cm.basiccompany.localhost
127.0.0.1 id.basiccompany.localhost
127.0.0.1 www.basiccompany.localhost
3. Create and Trust an SSL Certificate
Since the new domain will run over HTTPS, generate a wildcard certificate and trust it locally. Run the following command in Windows PowerShell
New-SelfSignedCertificate -CertStoreLocation Cert:\LocalMachine\My -Subject "*.basiccompany.localhost" -DnsName "basiccompany.localhost", "*.basiccompany.localhost" -FriendlyName "BasiCcompanyLocalHost" -NotAfter (Get-Date).AddYears(10)After the certificate is created:
- Open certlm.msc
- Navigate to Personal → Certificates
- Locate the new certificate
- Copy it to Trusted Root Certification Authorities
- Right-click it → All Tasks → Export
- When the Certificate Export Wizard opens:
- Click Next
- Choose Yes, export the private key
- Choose Personal Information Exchange (.PFX)
- Keep these options checked:
- Include all certificates in the certification path
- Export all extended properties
- Keep these options checked:
- Set a password
- Choose an export path, for example:
c:\projects\cert\cert.pfx - Finish the wizard
- Now you have a
.pfxfile containing certificate + private key.
Next step is to convert this pfx file into PEM file which we will need later. For this open command Prompt as administrator and navigate to C:\Program Files\Git\usr\bin and run the following command which will generate the PEM file in the same folder
.\openssl.exe pkcs12 -in c:\projects\cert\cert.pfx -out c:\projects\cert\cert.pem -nodes4. Bind the Hostnames to CM and Identity websites in IIS
Open IIS and:
- Select the CM website
- Update the HTTPS binding to use cm.basiccompany.localhost
- Choose the certificate you created in the previous step which should be named BasiCcompanyLocalHost
- Select the Identity website
- Update the HTTPS binding to use id.basiccompany.localhost
- Choose the certificate you created in the previous step which should be named BasiCcompanyLocalHost
At this point, visiting https://cm.basiccompany.localhost should load your Sitecore instance (even if login doesn’t work yet).
5. Copy Sitecore CM to docker\deploy\platform
In order to make sure that you do not change the Visual Studio Publish destination for this setup we will need to copy Sitecore CM folder to {Your source root}\docker\deploy\platform
- Open CM folder by right-clicking on CM website and click explore
- Copy all files to {Your source root}\docker\deploy\platform and copy its full folder path
- Right Click on CM website -> Manage Website -> Advanced Settings
- Then paste the path copied in step 2 and paste it in Physical Path field and click OK
6. Allow the New Domain in Identity Server
Identity Server only allows requests from specific origins. To enable your new CM domain, edit:
C:\inetpub\wwwroot\sc1041identityserver.dev.local\Config\production\Sitecore.IdentityServer.Host.xml
Locate line 17 (or the appropriate CORS block):
<AllowedCorsOriginsGroup1>
    https://sc1041cm.dev.local|https://cm.basiccompany.localhost
</AllowedCorsOriginsGroup1>
IMPORTANT: Save the file and Restart IIS, you can restart IIS by running iisreset /stop command in command prompt, run it again it it gives error. Identity server will not pick up the changes until IIS is restarted.
7. Install Sitecore Management Services and Sitecore Headless Services
Download the Sitecore Management Services package. The package is part of the download for Sitecore CLI. Also download Sitecore Headless Services
https://developers.sitecore.com/downloads/Sitecore_Headless_Rendering/22x/Sitecore_Headless_Rendering_2200
- https://developers.sitecore.com/downloads/Sitecore_CLI
- https://developers.sitecore.com/downloads/Sitecore_Headless_Rendering/22x/Sitecore_Headless_Rendering_2200
- https://github.com/SitecorePowerShell/Console/releases – Optional but a great tool
In Sitecore:
- Open Launchpad → Control Panel
- Click Install a package
- Upload and install
Sitecore Management Services - Repeat steps 1-3 for installing Sitecore Headless Services and Sitecore PowerShell
8. Test using GraphQL playground
Open https://cm.basiccompany.localhost/sitecore/api/graph/edge/ui and then copy the API key from Sitecore under /sitecore/system/Settings/Services/API Keys
Copy this key into HTTP Headers
{
  "sc_apikey": "{35537F26-6B0A-4A4F-8B76-02D823E4A4FE}"
}
and this into query, then click on run button in the middle of the screen, it should show rendered output on the right side
{
  item(path: "/sitecore/content/basicCompany/Home", language: "en") {
    rendered
  }
}
9. Publish Backend Changes
Open your solution file in Visual Studio in this case BasicCompany.sln, build the project under Deployment folder BasicCompany.Deployment and then Publish from Visual Studio. This will build and publish all projects to pre-configured location which will include all config and dll files.
If your solution do not have Deployment project you might need to manually publish all projects one by one to ensure all backend changes are applied to Sitecore.
10. Run Serialization command
Open your source code root folder in Windows PowerShell and run the following commands. Open it opens the browser, Login to Sitecore and then click Allow
dotnet tool restore

dotnet sitecore login --authority https://sc1041identityserver.dev.local --cm https://cm.basiccompany.localhost --allow-write true

dotnet sitecore ser push
This will push all items on disk to Sitecore.
11. Open Visual Studio Code to Run Frontend Website
Open your src\rendering or the folder containing your Frontend code. Make sure these values are correct in your .env file
PUBLIC_URL=http://localhost:3000

SITECORE_API_KEY={35537F26-6B0A-4A4F-8B76-02D823E4A4FE}

SITECORE_API_HOST=https://cm.basiccompany.localhost/

GRAPH_QL_ENDPOINT=https://cm.basiccompany.localhost/sitecore/api/graph/edge
We will need to run this command in terminal to ensure frontend without https can talk to backend with https
setx NODE_EXTRA_CA_CERTS "c:\projects\cert\cert.pem"Finally run the command to start frontend website
jss start:connectedIf you get this error,
jss : The term ‘jss’ is not recognized as the name of a cmdlet, function, script file, or operable program. Check the spelling of the name, or if a path was included, verify that the path is correct and try again.
please run the following command and then run above jss start:connected again
If everything goes well you should be able to access your website using http://localhost:3000 in browser.
12. Enable/Configure Experience Editor
We will need some additional settings to make sure that Experience Editor works
Make sure this value exists in your Next.js .env file
JSS_EDITING_SECRET=A9F41C7D3B28E6504F1DA2C98E7B54F3We will need to create and copy the below config file manually to \docker\deploy\platform\App_Config\Include\Project folder because we do not want this to be committed to source code. The file should be named as zEnbableEEOnLocal.config
<?xml version="1.0" encoding="utf-8"?>
<configuration xmlns:patch="http://www.sitecore.net/xmlconfig/" xmlns:role="http://www.sitecore.net/xmlconfig/role/" xmlns:set="http://www.sitecore.net/xmlconfig/set/">
    <sitecore>
        <settings>
            <setting name="JavaScriptServices.ViewEngine.Http.JssEditingSecret" value="A9F41C7D3B28E6504F1DA2C98E7B54F3" />
        </settings>
        <javaScriptServices>
            <apps>
                <app name="basiccompany">
                     <patch:attribute name="serverSideRenderingEngineEndpointUrl">http://localhost:3000/api/editing/render</patch:attribute>
                     <patch:attribute name="serverSideRenderingEngineApplicationUrl">http://localhost:3000</patch:attribute>
                     <patch:attribute name="deploymentSecret">A9F41C7D3B28E6504F1DA2C98E7B54F3</patch:attribute>
                </app>
            </apps>
        </javaScriptServices>
    </sitecore>
</configuration>
Hashtags
#Sitecore #SitecoreDevelopment #SitecoreHeadless #SitecoreCLI #IdentityServer #DevOps #WebDevelopment #DeveloperTools #SitecoreTips #SitecoreCommunity #LocalDevelopment
SEO Titles to get more visibility