
There are a few approaches you can use when creating components with Next.js in a Sitecore headless solution, they are well explained in this blog post. Sitecore first is the mostly commonly used approach, in this blog post I am going to walk you through high-level diagram and steps for creating components using this approach.
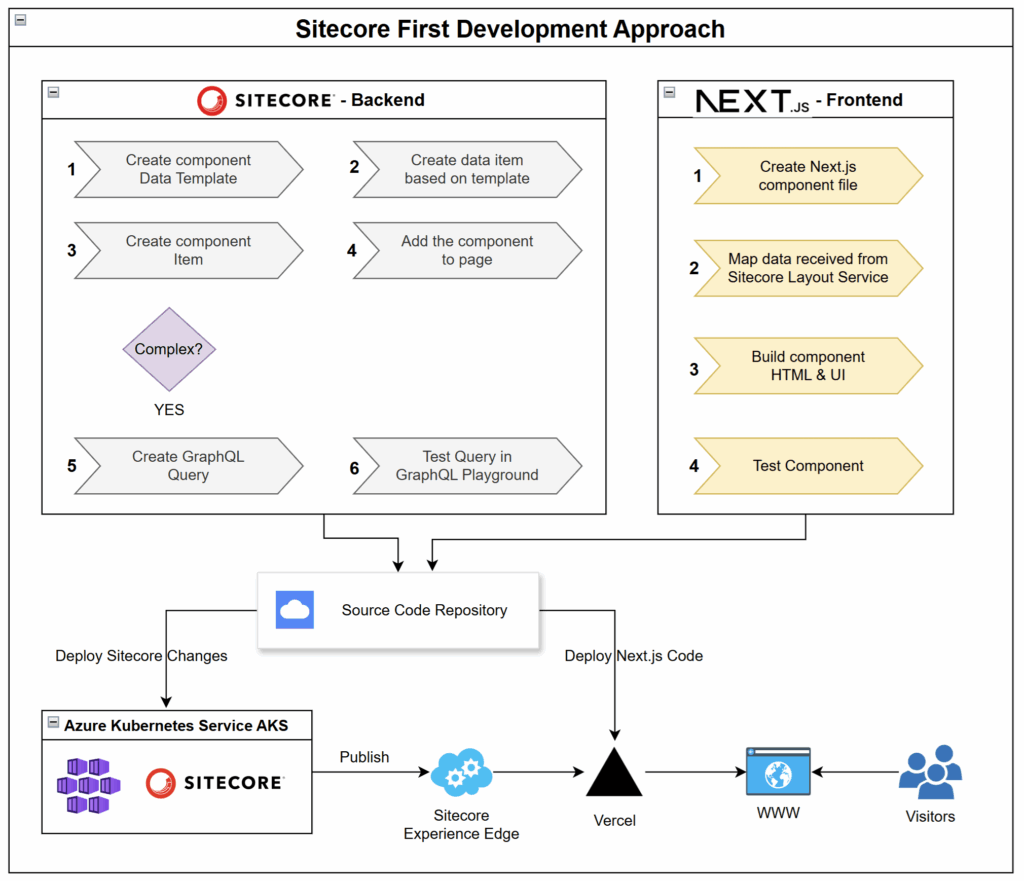
Sitecore – Backend Steps
- Create a component data template
Define the structure for your content, such as text fields, images, or links. - Create a data item based on the template
Add real content using the template you just made. - Create a component item
Create a rendering item for your component - Add the component to a page
Add the component to a page using presentation details and make sure data source is selected. - Create a GraphQL query (if needed)
For complex components, write a GraphQL query to get specific data from Sitecore. - Test the query in GraphQL Playground
Check that the data is coming through correctly before moving to the frontend.
Next.js – Frontend Steps
- Create a Next.js component file
Build a new React component that matches the Sitecore component name. - Map data from Sitecore
Map data received from Sitecore in your Next.js component. - Build the component’s HTML and UI
Add the design, layout, and styling for your component. - Test the component
Make sure the component displays and functions as expected on the test page.
Deployment Process
- Sitecore changes are deployed to Azure or where your Sitecore CM is hosted.
- Next.js code is deployed to Vercel or where your website is hosted.
- Sitecore content is published through Sitecore Experience Edge or CD which delivers content to the live website.
Summary
The Sitecore First Development Approach gives teams a clear workflow to build, connect, and deploy Sitecore and Next.js components. It helps ensure that content and design stay in sync, making the development process faster and easier for everyone involved.