
So, you finally got access to Sitecore Personalize. Exciting! As developer, first thing you want is to see it working, right? Lets start with the easiest way to integrate and test before we start exploring the best and most suitable option.
Sitecore offers many ways to integrate. But for quick start, JavaScript method is best. It’s simple, works everywhere. Even if documentation exists, first-timers often face issues. I will try to help you avoid that.
Important note: Sitecore Personalize works for any website. Doesn’t matter if your site uses WordPress, React, PHP, or anything else. Hosting platform is also not a problem as it supports all platforms. This is a big advantage because there is a misconception that it is only for Sitecore-built web sites which is obviously not true.
Sitecore Personalize JavaScript Integration Code
Below is the code you can add your html page inside a <script> element to integrate it or you can create a js file with this code and add reference to the js file in your html page. You will need to replace two fields in this code details mentioned below.
var engage = undefined;
var s = document.createElement("script");
s.type = "text/javascript";
s.async = true;
s.src = "https://d1mj578wat5n4o.cloudfront.net/sitecore-engage-v.1.4.3.min.js";
var x = document.querySelector("script");
x.parentNode.insertBefore(s, x);
s.addEventListener("load", async () => {
var settings = {
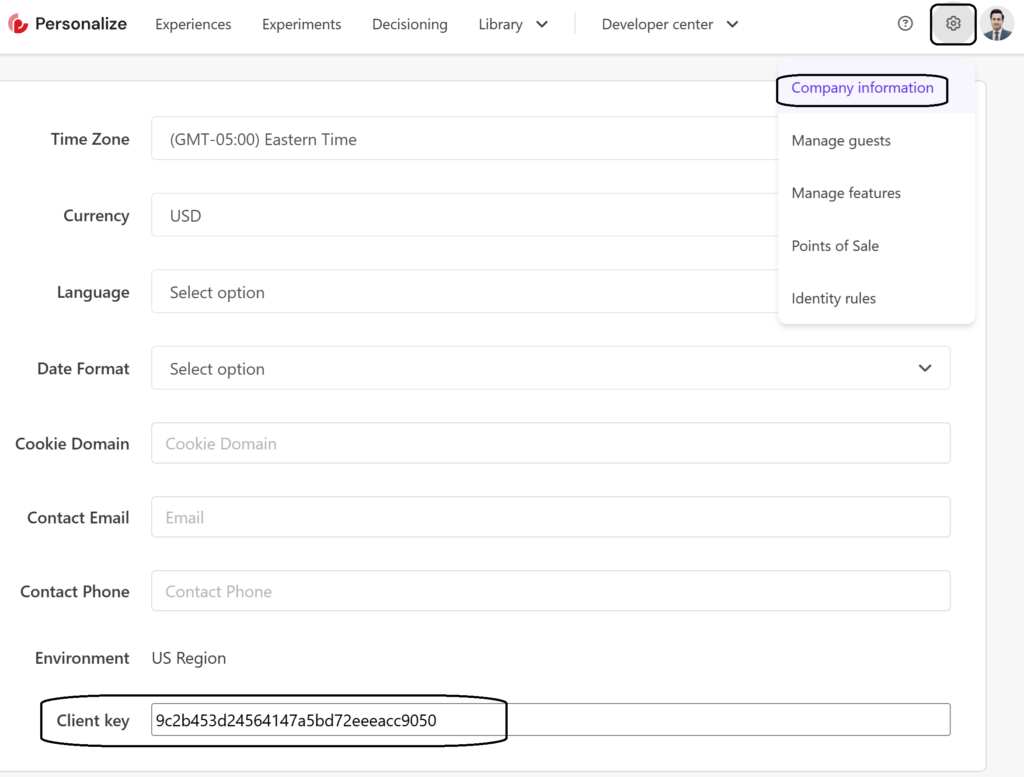
clientKey: "9c2b453d24564147a5bd72eeeacc9050", // In Sitecore Personalize, on the navigation pane, click > Company information > Client key.
targetURL: "https://api-engage-us.sitecorecloud.io",
pointOfSale: "demo",
cookieDomain: "", // Leave blank for testing, on production this can be .yourdomain.com
cookieExpiryDays: 365,
forceServerCookieMode: false,
includeUTMParameters: true,
webPersonalization: true
};
window.Engage.init(settings).then(function (result) {
engage = result;
var event = {
channel: "Web",
language: "EN", // For multi-lingual site this should be dynamic, you can have your app store it in cookie and you read it from cookies here
currency: "USD", // This should be dynamic, you can have your app store it in cookie and you read it from cookies here
page: window.location.pathname
};
engage.pageView(event);
});
});Link to JavaScript file on GitHub: https://github.com/zaheer-tariq/Sitecore-Blog-Gists/blob/main/Personalize/engage.js
Link to fully working HTML Page with Script Included: (You will need to update clientkey and pointOfSale and host this file)
https://github.com/zaheer-tariq/Sitecore-Blog-Gists/blob/main/Personalize/SitecorePersonalize_WithJavascript.html
Things Needed for Integration
- Access to Sitecore Personalize (prod or nonprod).
- Client Key Can be found in Sitecore Personalize.
- Point of Sale (POS) created in Sitecore Personalize.
Step 1: Get Client Key
- Log into Sitecore Personalize and Open your Sitecore Personalize App.
- On top-right corner, Click settings icon (⚙️) > Company information > Copy Client key at the bottom of the page.
Step 2: Create Point of Sale
- Click settings icon (⚙️).
- Go to Point of Sale section.
- Create new POS. Remember its name.

Step 3: Create a Personalization/Experience for testing
Testing needs a “Experience” in Sitecore Personalize. Here’s how you can create one for testing.
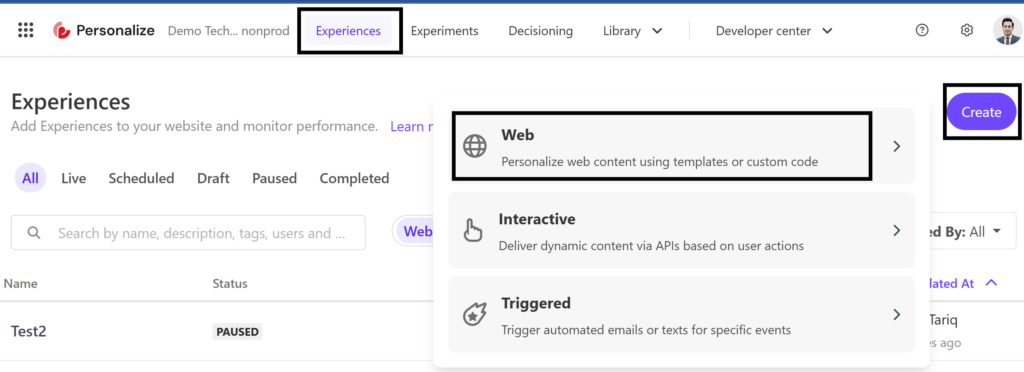
- Go to Experiences in top menu.
- Click Create button (top-right) then select Web i.e. the first option.
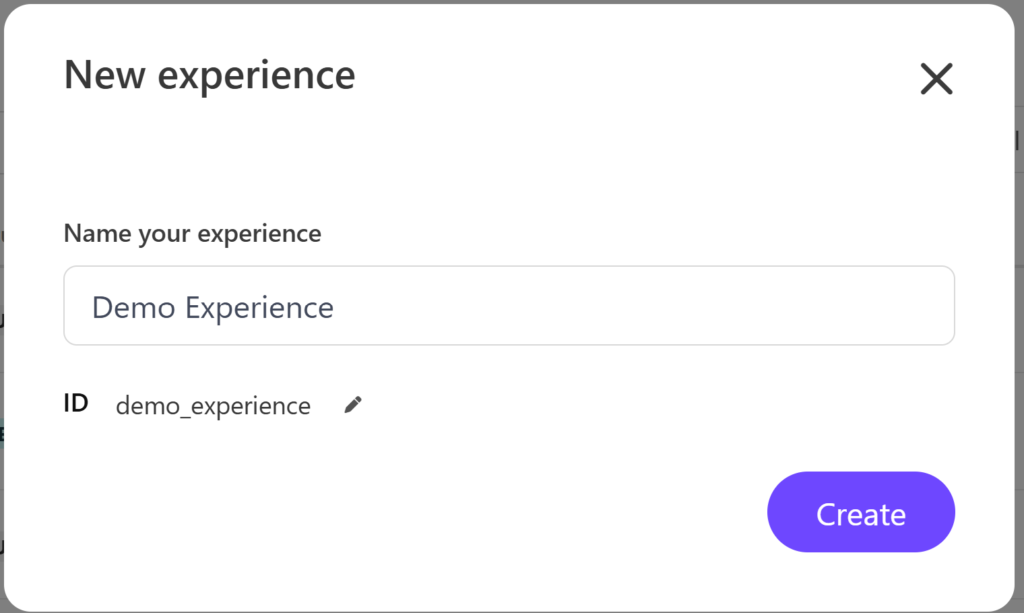
- Name your experience.
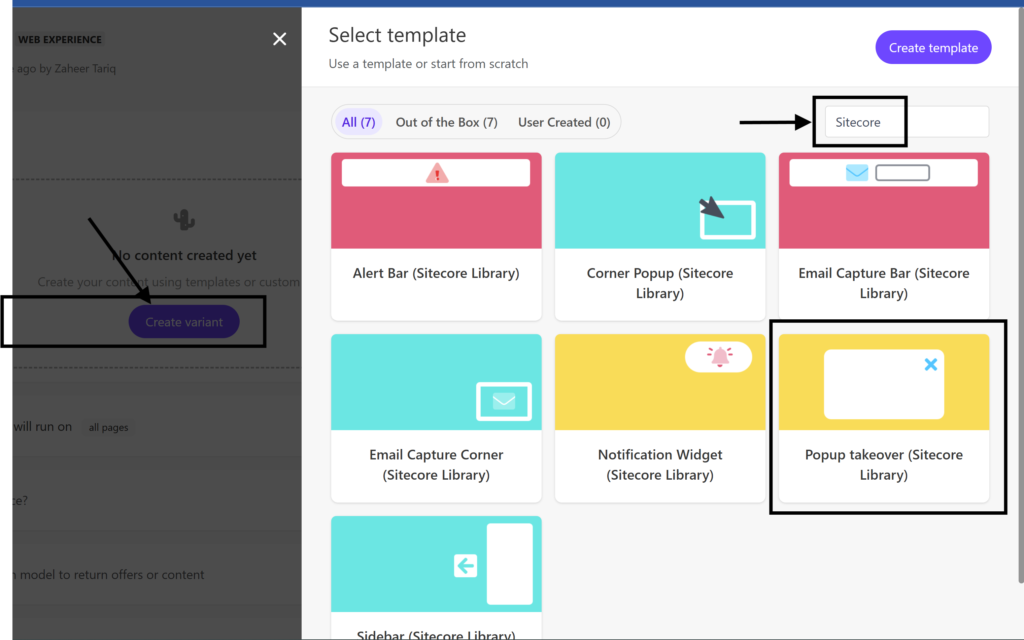
- On next screen, Create Variant.
- Important: Select Sitecore Variant only. Other types may cause errors.
- Start experience.
Wait few minutes, then visit website. Personalization should appear!
How to test?
For quick test, create simple HTML page. You can download sample code from https://github.com/zaheer-tariq/Sitecore-Blog-Gists/blob/main/Personalize/engage.js
- Add Script to HTML
Put this code in<head>section: - Add a reference to the JavaScript file
Replace placeholders with your Client Key and Point of Sale.
- Host Locally
Use IIS, Local Server or if you have another hosting option. For me it did not work when I opened the HTML directly in browser without hosting. - Check If Works
If setup right, you see no errors in console you should see the Personalization in action.
Integrate into Real Website
Once test works, add same code to actual site. Best practice:
- Add script to all pages (use template/master page). Make sure the script loads as early as possible with page load.
- Similar to adding Google Tag Manager.
Common Issues & Tips
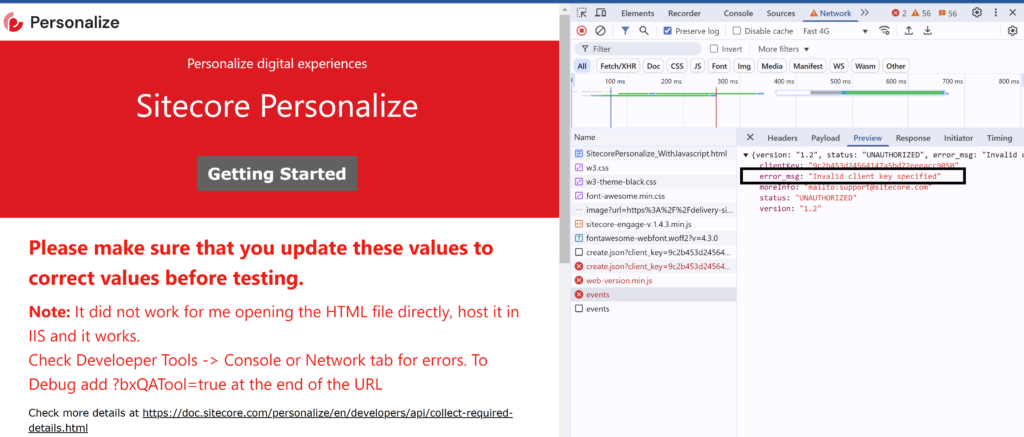
- Script not loading? Check client key & Point of Sale spelling.
- No personalization showing? Ensure experience is active and variant correct.
- Use browser Developer Tools (F12) > Console or Network Tabs to debug errors.
Sitecore Personalize Debug Mode
Sitecore Personalize comes with a handy debug tool. To Debug add ?bxQATool=true at the end of the URL
Conclusion
Start with simple HTML test to see it working and understand the basic setup. Once integrated, you can explore advanced features. Remember, key is to test step-by-step.
Happy coding! Let me know in comments if you face issues.
Hashtags:
#Sitecore #SitecorePersonalize #WebDevelopment #JavaScript #DeveloperGuide #TechTutorial #DigitalExperience #WebDev #Personalization #TechTips