
Building a custom Sitecore solution might take only a few months, but content authors will be using it for years. Their feedback and opinions shape how others think about Sitecore. Helping content authors build and test content faster is the first step towards a successful Sitecore implementation.
Content authors are the real heroes of any Sitecore project. They are the ones who create and manage the content that shapes the user experience every day. As developers and Sitecore enthusiasts, it’s our job to make sure their work is as easy as possible. Sadly, I’ve seen many situations where content authors are frustrated because Sitecore is slow or doesn’t work the way they expect. Most of the time, this isn’t Sitecore’s fault but rather how it’s been set up. It’s tough to hear this kind of feedback, but it shows us that we need to improve how we build Sitecore solutions. That’s why I’m starting this blog series to share ways we can help content authors reduce steps and have a better experience with Sitecore.
Adding ‘View Published Page’ Option in Sitecore
One of the first tasks a content author performs after creating a new page is previewing how it will appear to the end user. Unfortunately, Sitecore doesn’t offer an out-of-the-box solution to easily retrieve the item’s URL for the website. Sitecore does have preview feature, but many Content Authors prefer testing it with the actual URL.
I have seen many people copying item path and then replacing spaces with hyphens. This challenge is compounded when item buckets or URL manipulations are involved, making it difficult for authors to predict the final URL. Moreover, content authors often work with Sitecore solutions where changes are first previewed using a staging environment before being published. In these cases, having a quick way to view both the staging and live URL can save significant time and provide a quick way to grab the final working URL.
In this post, I’ll guide you on how to add button to the Sitecore’s Top Ribbon that will allow content authors to quickly view the Published Page by opening it in new browser Tab. This solution is especially helpful if you’re working with multiple environments or multi-site solutions, as it eliminates the need to memorize different public URLs.
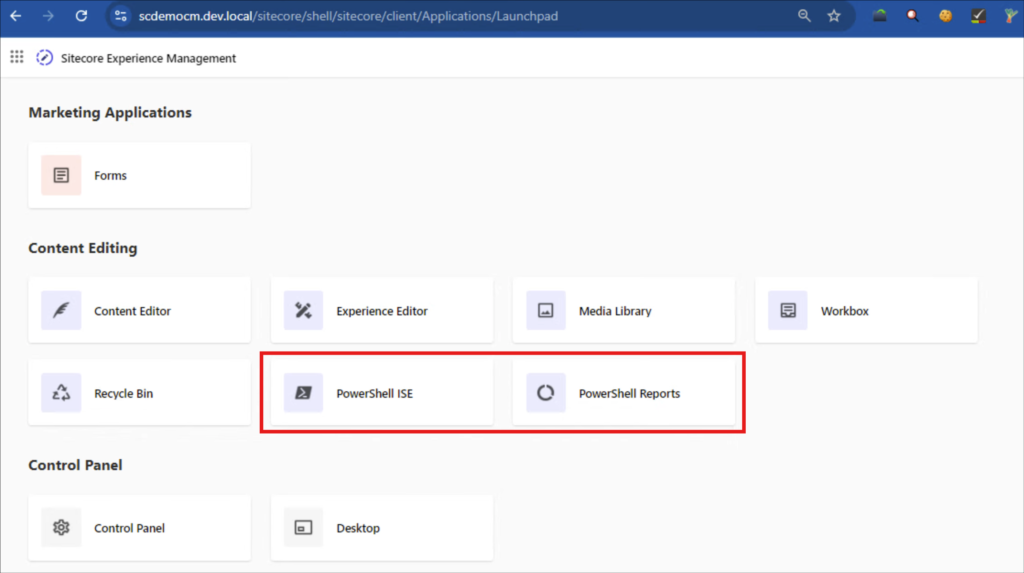
There are multiple ways of achieving this but we will be using Sitecore PowerShell Extensions (SPE) to add a button to the Top Ribbon. If you don’t already have PowerShell Extensions installed, you can download and install them from this link. Don’t worry about the link referring to “Experience Accelerator” you can still choose your Sitecore version and find the PowerShell Extensions download file. Install it like any other Sitecore package. You will see these two options in Sitecore Dashboard if you have Sitecore PowerShell Extensions installed.
Once Sitecore PowerShell Extensions is installed, follow these steps:
1. Navigate to the PowerShell Script Library
Go to /sitecore/system/Modules/PowerShell/Script Library in your Sitecore instance.
2. Create a New Item
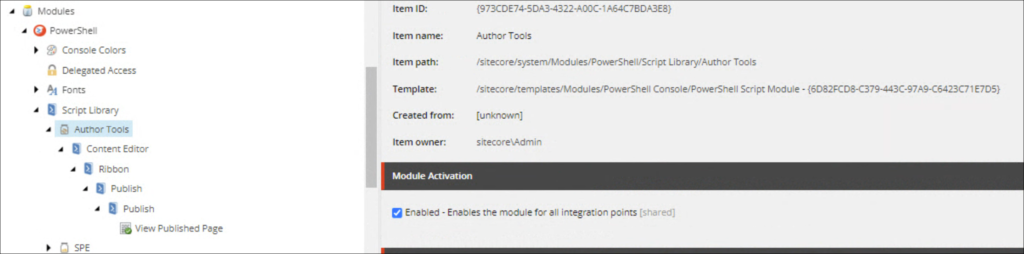
Add a new item based on the template PowerShell Script Library. Let’s call it Author Tools. Ensure that the setting “Enabled – Enables the module for all integration points” is checked. Without this, the feature won’t work.
3. Set Up the Path for the Script
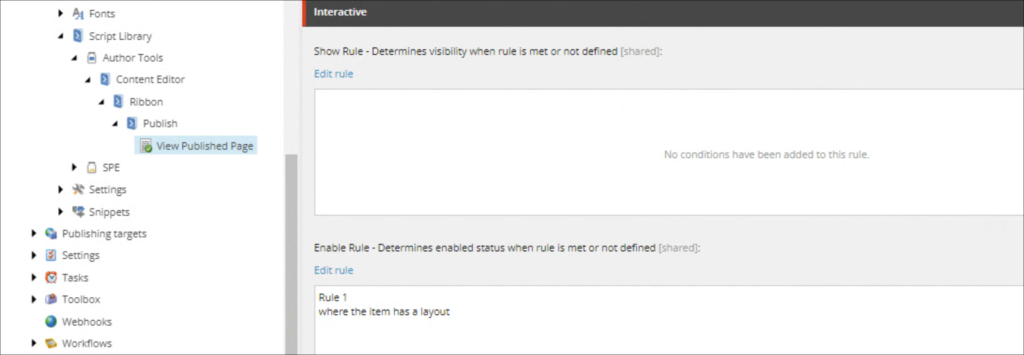
Create a path of items under /sitecore/system/Modules/PowerShell/Script Library/Author Tools/Content Editor/Ribbon/Publish/Publish, using the PowerShell Script Library template. Be sure to follow the exact same names for the path as shown below.
4. Add the “View Published Page” Item
Next, add another item called View Published Page based on the PowerShell Script template. You can rename this item to something more descriptive if desired. Add a nice icon as this will be shown in Top Ribbon. This is where you’ll store the script that will open the published page on the live site.
5. Add the PowerShell Script
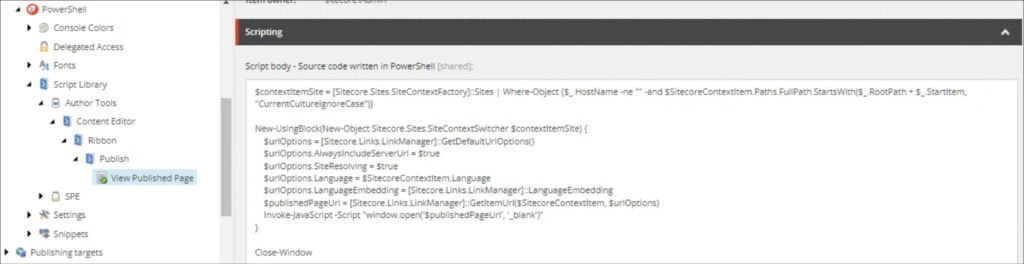
In the Script Body field, insert the following PowerShell code. This script will handle opening the page on the live site in a new browser tab:
$contextItemSite = [Sitecore.Sites.SiteContextFactory]::Sites | Where-Object {$_.HostName -ne "" -and $SitecoreContextItem.Paths.FullPath.StartsWith($_.RootPath + $_.StartItem, "CurrentCultureIgnoreCase")}

New-UsingBlock(New-Object Sitecore.Sites.SiteContextSwitcher $contextItemSite) {
    $urlOptions = [Sitecore.Links.LinkManager]::GetDefaultUrlOptions()
    $urlOptions.AlwaysIncludeServerUrl = $true
    $urlOptions.SiteResolving = $true
    $urlOptions.Language = $SitecoreContextItem.Language
    $urlOptions.LanguageEmbedding = [Sitecore.Links.LinkManager]::LanguageEmbedding
    $publishedPageUrl = [Sitecore.Links.LinkManager]::GetItemUrl($SitecoreContextItem, $urlOptions)
    Invoke-JavaScript -Script "window.open('$publishedPageUrl', '_blank')"
}

Close-Window
6. Add Rules for Interactivity
To make the button more interactive, you can configure rules to ensure it is only enabled for items that have layouts and can be viewed as a page. Navigate to the “Interactive” section of the item, and in the Enable Rule field, add a rule specifying that the button should only be enabled if the item has a layout. This is easy to set up in Sitecore with just a few clicks.
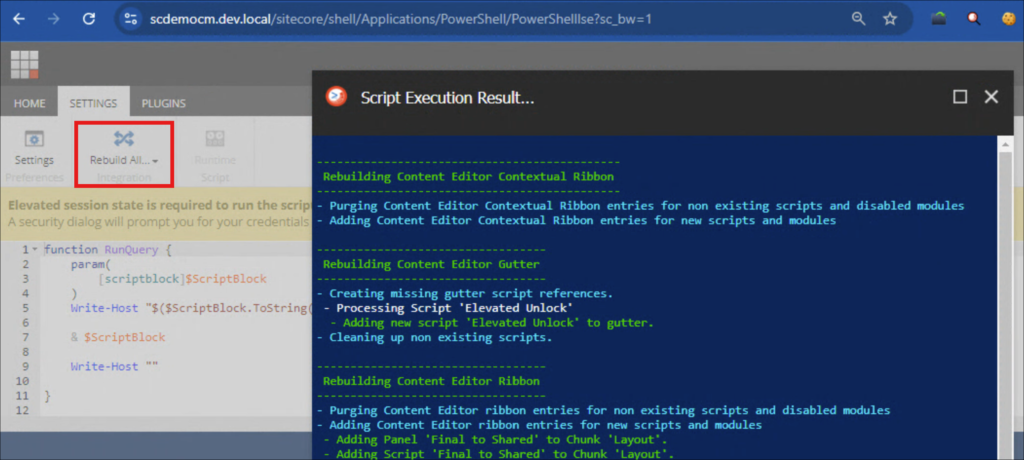
7. Rebuild the Script to Apply Changes
After saving your changes, you won’t see the button right away. To make it visible, open PowerShell ISE from the Sitecore dashboard. Click on Settings in the top toolbar, and then select Rebuild All. This will execute the script and generate a report. Once completed, you can close the window.
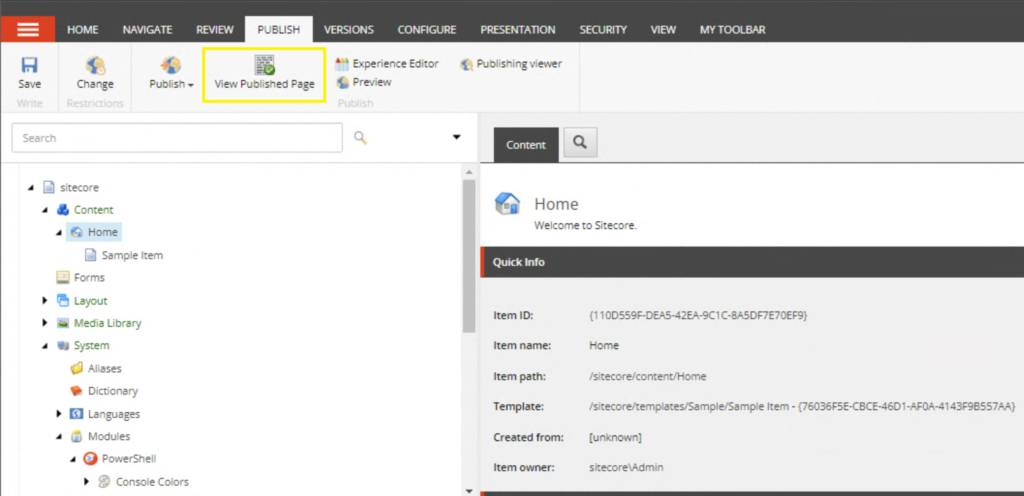
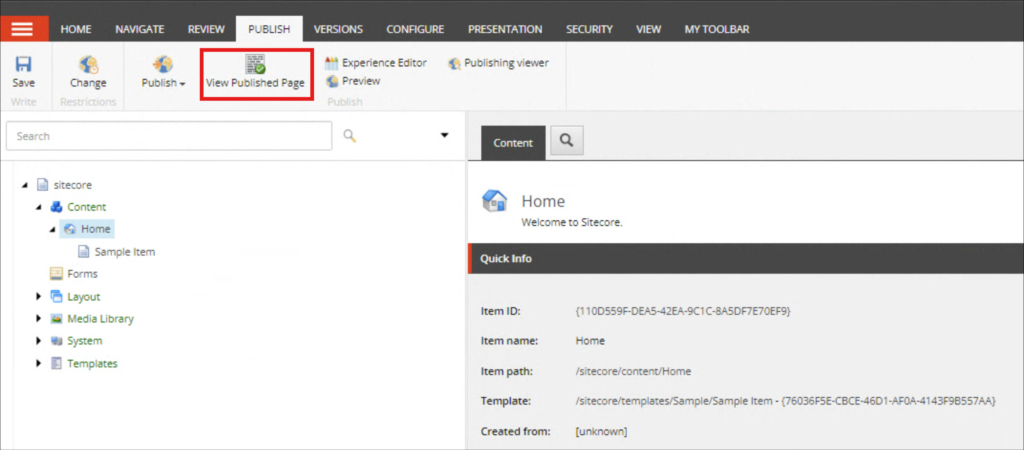
Once Done, go back to Content Editor and you will see a beautiful button the Publish Tab. Clicking it will open the currently selected page in a new browser tab with the actual website URL.
This is how the button will look like if you are on an item that does not have a layout

Troubleshooting
- If the button is not appearing after “Rebuild the Script to Apply Changes”, check that you have checked “Enabled – Enables the module for all integration points” on the Author Tools item.
- If the Button is visible but not working it means there is an error in the script. Usually this is caused by incorrect site configurations or if the script is not able to resolve the site. You can go to PowerShell ISE and use below script to debug the issue
$SitecoreContextItem = Get-Item -Path "master:" -ID "{110D559F-DEA5-42EA-9C1C-8A5DF7E70EF9}"

write-host $SitecoreContextItem.FullPath

$contextItemSite = [Sitecore.Sites.SiteContextFactory]::Sites | Where-Object {$_.HostName -ne "" -and $SitecoreContextItem.Paths.FullPath.StartsWith($_.RootPath + $_.StartItem, "CurrentCultureIgnoreCase")}

if (!$contextItemSite)
{
    $contextItemSite = [Sitecore.Sites.SiteContext]::GetSite("website")
}

write-host $contextItemSite.Name

New-UsingBlock(New-Object Sitecore.Sites.SiteContextSwitcher $contextItemSite) {
    $urlOptions = [Sitecore.Links.LinkManager]::GetDefaultUrlOptions()
    $urlOptions.AlwaysIncludeServerUrl = $true
    $urlOptions.SiteResolving = $true
    $urlOptions.Language = $SitecoreContextItem.Language
    $urlOptions.LanguageEmbedding = [Sitecore.Links.LinkManager]::LanguageEmbedding
    $publishedPageUrl = [Sitecore.Links.LinkManager]::GetItemUrl($SitecoreContextItem, $urlOptions)

    write-host $publishedPageUrl

    #Invoke-JavaScript -Script "window.open('$publishedPageUrl', '_blank')"
}
Small changes like these can make a big difference in how Sitecore is perceived by content authors, helping them feel more confident and satisfied with the platform. Stay tuned for more tips on improving the content author experience in Sitecore!
Keywords: Sitecore, content authors, Sitecore development, Sitecore implementation, Sitecore tips, Sitecore experience, content management, Sitecore customization, content author workflow, improving Sitecore, view published page, view live page, add custom button in sitecore, sitecore top ribbon add custom button, invoke custom action in sitecore
Hashtags: #Sitecore #ContentAuthors #SitecoreDevelopment #CMS #ContentManagement #SitecoreTips #WebDevelopment #DigitalExperience #SitecoreCommunity #UserExperience, #ViewPublishedPage, #ViewLivePage,